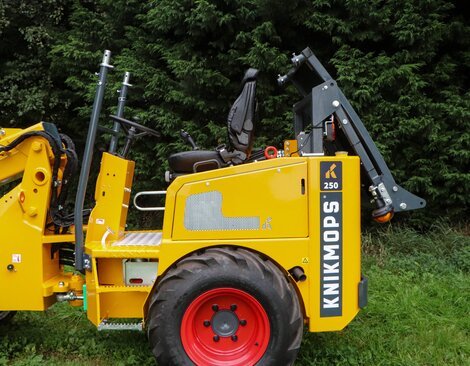
Assembled in seconds
Before starting, make sure that you have enough space behind your Knikmops to fold the roof away (or up) and stop the machine. Make sure that the machine is perfectly upright with all four wheels on the ground.
Start at the front of your Knikmops. Remove the upper pipe clips. Now you can lower the two pipes. According to the design, the pipes do not fold away but actually slide in. Thanks to this, the folded-in safety roof takes up no more space than necessary. Place the pipe clips back on the collapsed pipes. This is to avoid losing them and to prevent the pipes from moving about too much in their sleeves.
Stand behind your Knikmops and remove the pins at the bottom of the safety roof. You can now fold the roof back. Remember that the roof is made of high-grade steel, so make sure you can handle the weight. Once the roof has been folded back, put the pins back into their holes. This is to avoid losing them and to ensure that the roof stays firmly up.
Now remove the pins located at the hinge points with the roof. Then fold the roof back up; it should now be doubled up at the rear of your machine. Place the pins back into their holes. This ensure that the roof remains firmly up.
Check that everything is fastened correctly, and if needed turn the bolts a little tighter using an M6 key. This allows you to reduce rattling to a minimum. The rear part of your Knikmops now sticks out an extra 20 cm or so, which requires some attention when manoeuvring.
Now you can easily pass that low entrance with your Knikmops!


